- GitLab - Introduction
- GitLab - Installation
- GitLab - Git Commands
- GitLab - SSH Key Setup
- GitLab - Create Project
- GitLab - Fork a Project
- GitLab - Create a Branch
- GitLab - Add a File
- GitLab - Rebase Operation
- GitLab - Squashing Commits
- GitLab Users and Groups
- GitLab - Adding Users
- GitLab - Create Groups
- GitLab - Remove Users
- GitLab - User Permissions
- GitLab Issue Tracker
- GitLab - Create Issue
- GitLab - Merge Requests
- GitLab - Referencing Issues
- GitLab - Milestones
- GitLab - Wiki Pages
- GitLab Instance Management
- GitLab - Create Backup
- GitLab - Restore Backup
- GitLab - Import Repository
- GitLab Continuous Integration
- GitLab CI - Introduction
- GitLab - CI/CD
- GitLab - CI/CD Variables
- GitLab CI - Permissions
- Configuring GitLab Runners
- GitLab CI - Advanced usage of CI
- GitLab CI - Cycle Analytics
- GitLab CI - Container Registry
Selected Reading
GitLab - Create Backup
GitLab allows to take backup copy of your repository by using simple command. In this chapter, we will discuss about how to take backup copy in the GitLab −
Step 1 − First, login to your GitLab server using SSH (Secure Shell).
Step 2 − Create the backup of GitLab by using the below command −
sudo gitlab-rake gitlab:backup:create

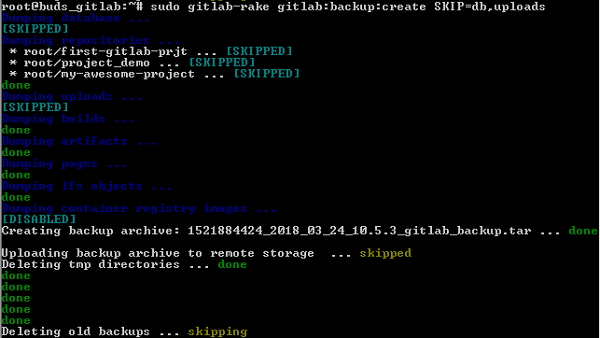
Step 3 − You can exclude some directories from the backup by adding environment variable SKIP as shown below −
sudo gitlab-rake gitlab:backup:create SKIP = db,uploads
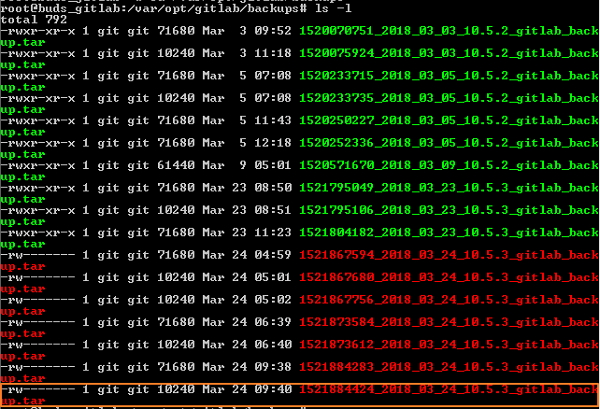
Step 4 − The backup tar file will get created in the default /var/opt/gitlab/backups directory. Navigate to this path and type ls -l to see the created backup file −

Advertisements
8